Hi Everyone! As promised, here are some pics and my thoughts about putting MAC's Fluidline in my waterline.
To the left, I have a pic of how my eyes looked after I had put on eye makeup (without mascara), including the gel liner in my waterline. As suggested by JuicyStar07, I dried my waterline first, with a cotton swab. Then, using an angled brush, I applied MAC's Blacktrack into my waterline. Drying my waterline with a cotton swab felt a little funny at first, but it wasn't as bad as I thought it was going to be. I do agree that it helps the liner apply easier, and probably helps it stay on longer, so it's a good step to include.
This second pic is blurry, but this is after I applied a purple eyeshadow (the darker color of NARS's Jolie Poupee Eyeshadow Duo) over the Fluidline. As you can see, it softened up the lower lashline, so it wasn't a harsh black line. Plus, it's always good to set a liquid with a powder. =)
This pic to the left was taken 8 hours after application. I know my eyes look like their facing weird directions (I feel like ALL these pics make me look like I have a lazy eye or something!)....but anyhoo, you can see that most of the waterline makeup is still there.
Yes, I know, this pic to the right is blurry, but you can see that if you're looking straight at me (and not down into my waterline), the liner is holding up pretty well. =)
Hmm...not sure why my eyes are kinda pink in all the pictures. I don't remember them looking so pink that day....maybe it's just something the camera picked up.
Soo....in comparison, I must agree that gel-lining the waterline definitely lasts longer than just using a plain eyeliner. Usually, I need to reapply a regular eye liner into my waterline every 4-6 hours (if I'm not being lazy, lol). It's really annoying to have your makeup disappear (into your eyes?) after you've spent a lot of time making sure you have it they way you want. With using a gel liner, I could apply it and forget about it, knowing that it'll stay put for at least 6-8 hours. It applies really smoothly, though I want to get a softer brush. My angled brush (MAC's 208) is perfect for eyebrows and applying gel liner to my top lid, but it feels a little rough when applying to my waterline. I know MAC has a softer, albeit larger, angled brush...so I might pick one up this weekend...along with Bad Fairy (one of their 3 new nail polishes coming out for their Villainous Villains collection). I've seen some pictures and reviews on it, and it looks fantastic! And the guru's say that there's no dupe for it, so I'm definitely splurging the $12.50 for it. =) I believe I'll be heading there on Sunday, so I'll try to get it swatched that night to include with my latest nail polish haul. I can't believe I haven't done one in FOREVER....but I haven't really bought that many since I've become preggerz. However, I decided it was time to update my collection for the fall, and have bought quite a few polishes (8 so far, + Bad Fairy will make 9, lol).
I also have a quick and easy nail art tutorial that I'm putting together coming soon. My nails look pretty enough for a bridesmaid in my best friend's wedding this weekend. I'm not 100% thrilled with them, because they don't look close enough to the photo I based it on....but hey, that was probably done by a professional, and I'm just a lil old amateur. =/ Still, I can't wait to show them off at tomorrow's rehearsal. =) I'll also be following a hair tutorial to get a Taylor Swift inspired look for my hair. I'll probably take a before and after pic for that, and post them as well. Lots of stuff to come, it seems like!
Anyhoo....till next time!
Disclaimer: 1. I bought every product I'm showing by myself (nothing was sent to me for free). 2. No one has paid me or compensated me for this video or blog. 3. I am not affiliated with any of the companies of the products I used. 4. These are my honest opinions.
Hi Everyone! After letting my nails rest a few days, I had finally found a design I wanted to try out. This look is based on a picture I saw online...somewhere on Coolnailart.com. Unfortunately I don't have the link or the name of who posted it, but if you see it or it's yours, please msg me so I can give you the proper credit!
So...back to the look. Basically it's an arrow French, with a heart drawn in where the bottom point fits in snugly to the arrow. It's a pretty cute idea, and I thought I'd give it a try. Unfortunately, I draw hearts with a brush like a little boy would. =/ I'm sure with more practice I'll be able to get it....maybe.
Here's the video I uploaded to YouTube (Steps are simplified):
Bluish Holographic Glitter
Gelish: PH Bond
Gelish: Foundation Gel
Gelish: Water Field
Gelish: Gossip Girl
Gelish: Top Seal
Beauty Headquarters Gel: White
How to create the look:
*Note: If you want to do this look in regular nail polish, ignore the gel-requirements like curing and such.
Step 1: Clean nails with alcohol
Step 2: Apply PH Bond
Step 3: Apply a thin coat of Foundation Gel (Base Coat)
Step 4: Cure for 30 sec
Step 5: Apply one coat of Base Color (I used Gelish: Water Field)
Step 6: Cure for 1 min
Step 7: Apply one coat of Tip Color in a French Arrow Tip (I used Gelish: Gossip Girl)
Step 8: Cure for 1 min
Step 9: Apply second coat of Tip Color
Step 10: Cure for 1 min
Step 11: Draw a Heart (I used BH Gel: White)
Step 11a: If you want to, you can add glitter using a thin brush on top of the white. (Optional)
Step 11b: If you want to, you can add rhinestones (I used blue ones on my right hand.)
Step 12: Cure for 2 min
Step 13: Apply Top Seal (Top Coat)
Step 14: Cure for 2 min
Step 15: Clean of tacky layer with alcohol
And voila! You have a French Heart Manicure! This pic to the left is my right hand. You can see that my left hand is totally incapable of drawing a good heart, but I tried to camouflage it with rhinestones.
Now, this look takes a lot of patience...I think I spent almost 2 hours....but I was super slow! I'm sure if I had to do it again, I could do it in a lot less time. The part that took really long was drawing those damn hearts, lol. I bought a brush (shown in the pic above), but I realize now that I should've bought a thinner brush that could draw thin lines easier. But I guess it's cool. It was my first time using that kind of gel for nail art....I think it's really hard, but the gel is kinda forgiving. I plan to try out flowers next...I've seen a video that makes it look easy. =)
In this pic to the right, You can see that the glitter part got a little messy on my thumb. I fixed this by putting a layer of top seal after the French tip, but before the white hearts. This step is optional, but I just wanted to test it to see if it worked...which it did. =)
On my middle and pinky finger, I was able to brush off the excess glitter, whereas on my thumb the glitter stuck to my tacky layer. I should've put glitter on my right hand because it looks like the glitter camouflages the poorly shaped hearts a lot better than the rhinestones, lol.
All in all, I'm actually pretty happy with how my nails turned out. Obviously, my next try will look a lot better...but how often do I really re-do a look? Well, once in a blue moon...like with 3TanjaJ3's look that I've repeated like 3 times already, lol. I may try this out with regular nail polish....which I haven't worn in over a month, lol. =) This Gelish nail polish is just more convenient to wear because of the no-chipping and stuff, even if I don't last the whole 2 weeks before WANTING to change my polish, lol.
I've actually tried out using a gel-liner on my waterline and have taken some pics...I'll post that blog up sometime next week. =)
Till next time!
Disclaimer: 1. I bought every product I'm showing by myself (nothing was sent to me for free). 2. No one has paid me or compensated me for this video or blog. 3. I am not affiliated with any of the companies of the products I used. 4. These are my honest opinions.
Hey everyone! So my nails are currently nakkid (*gasp*) as I'm giving them a few days break before my next Gelish manicure. My last one (the red French tipped one) lasted about 10 days. Not bad! I could've made them last longer, but I was getting tired of them, so I figured I'd give my nails a break, and then figure out my next mani. =) I'm probably going to do another french manicure of some sort, but haven't decided on colors (I only have 4!) or type. I'll post pics when I finish them up!
In the meantime, I decided to make a post (even though there's a million of them out there) on fixing a dried up gel liner. My friend and I were in Sephora a few days ago. She was looking for some serum, and I was looking for a gel liner to replace the ones that dried up (I had 4! =( ). I had finally decided on a brand, when my friend came to see how I was doing. When I explained why I was getting a gel liner, she was like..."why don't you just add water? Everyone does that! Just google it!" (or something like that, lol). I had never thought of doing that, so I decided to go home without buying an replacements and look it up.
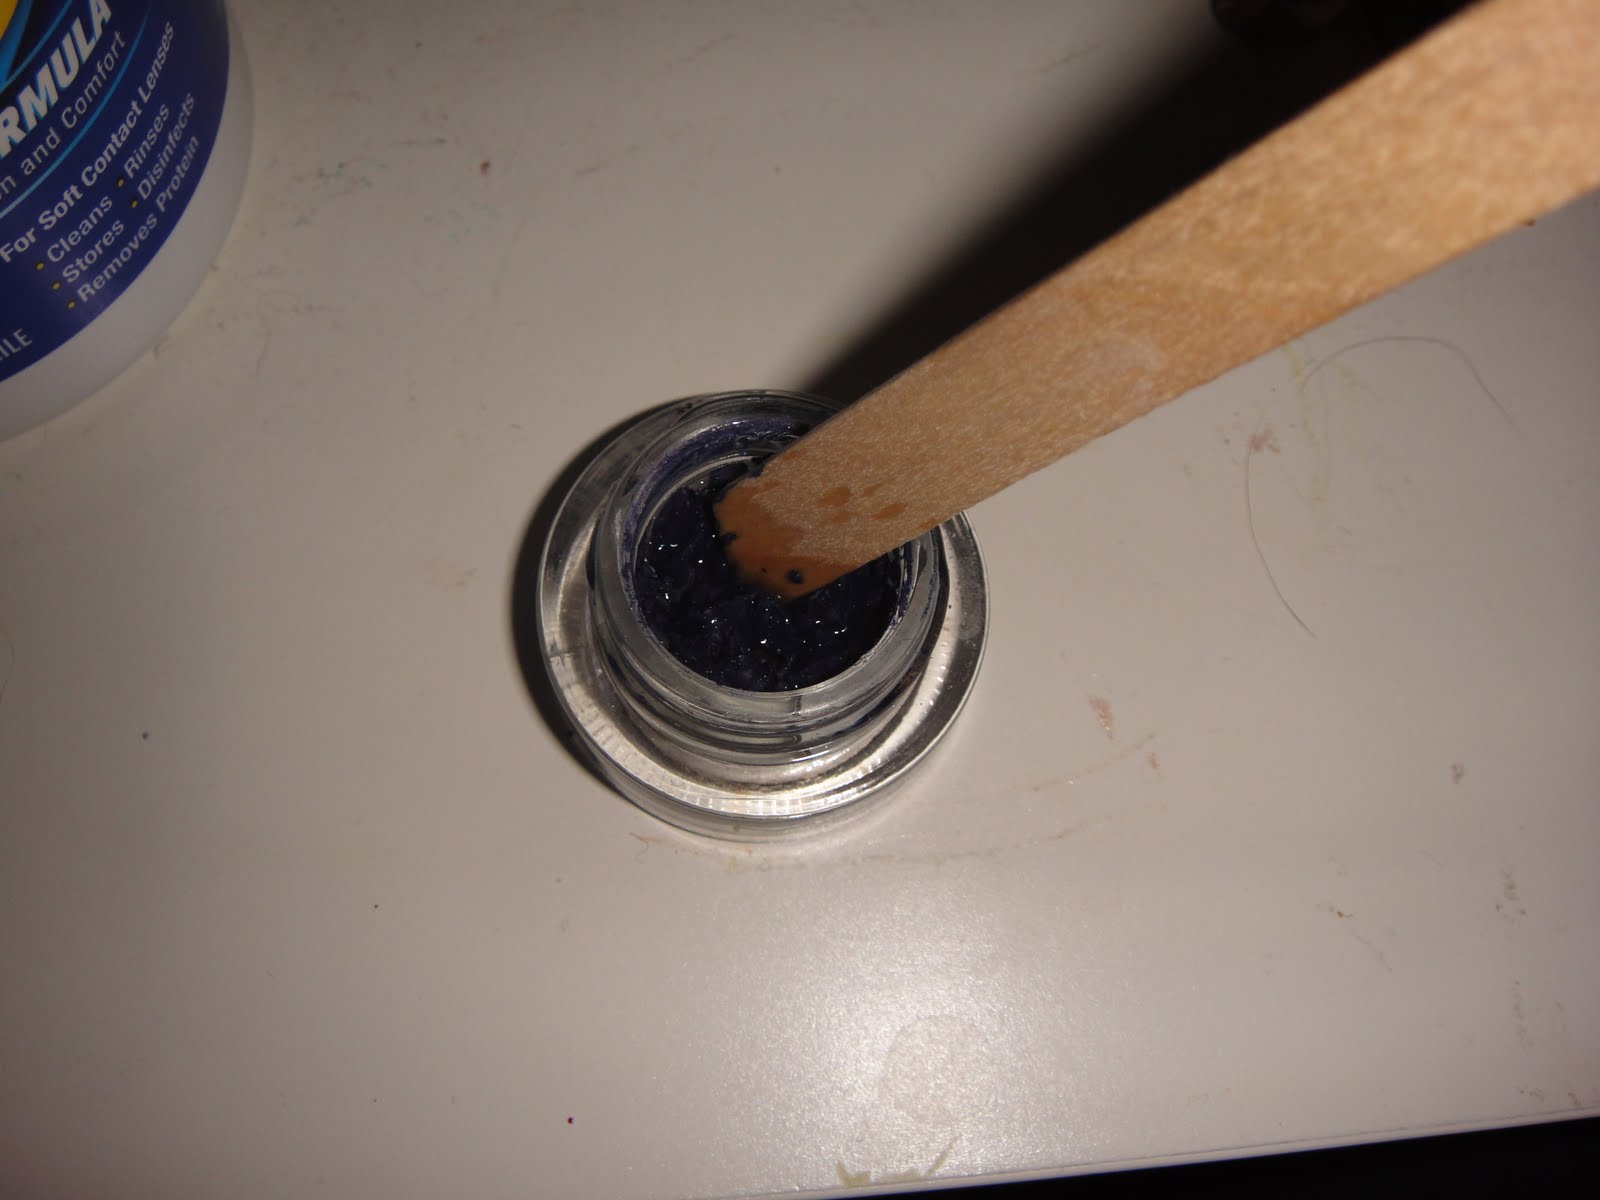
As you can see from the pic above, my gel liner was REALLY dried out. I didn't take pics of the other 3, but they were in a similar condition. After watching a few videos on YouTube, and reading a few blogs, I decided that I wanted to use contact solution. I know some people think that contact solution doesn't work as well as eye drops, but whatever. =P I decided on contact solution because it's obviously safe for your eyes AND it's supposed to be moisturizing (to some extent...yes, on this score, eye drops would be better....but I didn't have any on me at that exact moment!!). Anyhoo, so here's the solution I used. It's AMO's Complete Moisture Easy Rub Formula. It's a relatively new bottle...I would really hesitate at using expired contact solution. (Expired eye drops are okay though.)
Next, I took some hand sanitizer (for this, I would recommend a non-scented one because you don't want any irritants). I cleaned a new waxing stick with this, to kill all bacteria. Since you're working with stuff that goes near your eyes, you want to be extremely careful as to your tools and cleanliness.
I then put in a few drops of the contact solution into my gel liner, then started mixing it.
I actually mixed this for a good amount of time because I wanted the consistency to be even. Don't worry if you used too much contact solution...I'm pretty sure I put in too much too!
After I felt like I had gotten a pretty good even consistency, I used the stick to clean up the sides and push everything down to the bottom of the container.
What I ended up with is to the left. As you can see, the excess contact solution was at the top.
This was easily remedied by getting a q-tip and slowly patting out all the excess fluids.
It seemed to work out pretty nicely. However, when I tested the gel liner, the line was pretty watery. So I decided to heat it up and let it cool, in hopes that it would lock in the moisture.
I took some boiling water, and let it cool for about 5 minutes. Then I put the water into these little cups and stuck each gel liner into one.
Then I let this sit until the water was cool (about 10 minutes or so).
And the final result looked like this. Now when I tested it again, it still wasn't the exactly right...if you drew a line with a brush, it was still really easy to wipe off (not how a gel liner is supposed to be!).
So I decided to let this sit overnight (closed, not open!), and test it again in the morning.
To my surprise, in the morning, the gel liner was exactly how it was supposed to be! I'm sorry I don't have pics on the testing I did, but I think you'll see what I'm talking about if you try this.
Anyhoo, soooo the whole reason I even wanted to get my gel liners back was because I watched a YouTube video where someone used a gel liner on her waterline. Now, I normally use a regular pencil (or a kohl pencil sometimes) on my waterline, but I find that it doesn't stay very well. The girl (JuicyStar07) said that she dries her waterline with a cotton swab first, then applies a gel liner. She also suggests patting on a powder shadow to set the liner. Verrrry interesting...I wouldn't have thought to do that myself (except the powder part, lol)! So...I haven't actually tried this just yet...but I will! And I'll have to post back on how it went. I'm actually a little hesitant on the part where you dry your waterline with a cotton swab. I'm scared of fluff getting in my eyes...it's just those little strands that are so hard to get out, you know? Well, whatever. I'll have to buck up and try it, lol. Be a real (wo)man.
*Yawn* Time for bed! Till next time!
Disclaimer: 1. I bought every product I'm showing by myself (nothing was sent to me for free). 2. No one has paid me or compensated me for this video or blog. 3. I am not affiliated with any of the companies of the products I used. 4. These are my honest opinions.
Hi everyone! I know I said I was going to post a blog sooner, but unfortunately, my mother (the DOCTOR) has expressed a deep desire for me to STOP w/ my nails! Can you believe that? Of course you can...I can only imagine how all the fumes and whatnot can affect the poor little dear inside me. So, as a compromise, I've cut down...and I've dealt with the whole chipping thing with having her (yes, HER, lol) invest in a new gel polish system. I couldn't afford it without her, and I'm blessed she still spoils me! =)
This pic here is me sporting a cute French Mani, courtesy of babsita84's Faded French Hologram Manicure: http://www.youtube.com/watch?v=wnj3evqlXGQ . I think they turned out really cute, but it was quite tedious to do. You are supposed to put each hologram glitter on one at a time...as you can see, I got lazy and did a few at a time, and so my fade looks a little funny. =( Oh wellz! I still like them! And of course, I chose my Lakers Colors: Purple & Gold! =) Can't wait for the season to start!
Now, on to the Gelish Polish Review! Before actually buying a soak-off gel polish system, I did some research before choosing which brand I wanted to go with. There are many reviews of the big 3: CND's Shellac, OPI's Axxium, and Harmony's Gelish. The main reason I decided to go with Gelish over the others is the price. My manicurist friend told me that you get more bang for your buck with Gelish. LOL So yup, I brought my mom with me, and she seemed to like what she saw, so she bought me the whole system (as an investment, of course!).
*Update At ShearUp.com, there is a Gelish Starter Kit for $119.99! (Much cheaper than the $200 my mom spent to buy all the stuff I needed, lol.)
Now, this does seem a little pricey....but, you need to look at it from the other side as well. A typical gel polish manicure here, in the LA area, runs you about $30. I know on the east coast, they run closer to $60. So, if I do at least 5 manis/pedis with this set, I will have made it worth its investment. I've already done that, actually...mani/pedi on mom, mani/pedi on me (plus an extra French mani now!), and a mani/pedi on my mom's friend. That's 7 total...which is about $210. Not bad for owning it for 2 weeks, eh?
To the right is how my nails looked right after I was finished with them. The system is pretty simple.
Step 1: File/Shape your nails, push cuticles back.
Step 2: Clean nails with alcohol (on a lint-free wipe).
Step 3: Apply PH Bond.
Step 4: Apply Foundation Gel.
Step 5: Cure for 30 seconds.
Step 6: Apply 1 coat of color polish. (In my pic, my first coat was Gossip Girl.)
Step 7: Cure for 1 minute.
Step 8: Apply 2nd coat of color polish. (In my pic, my second coat was Water Field.)
Step 8: Cure for 1 minute.
Step 9: Apply Top Seal.
Step 10: Cure for 2 minutes.
Step 11: Remove tacky layer with alcohol (on a lint-free wipe).
And you're done! All in all it took about 30 minutes to do one manicure. Not too shabby!
Since it was my first try, I didn't do a great job...I got too close to the cuticles, and my top coat was too thick. My second time around, I kept all my coats thin, and the mani looks MUCH better!
This pic to the left is from the 2nd day. They look exactly how they did the day before. I wish you could see how shiny my nails are...it was almost as shiny as glass. The gels have a beautiful finish.
This pic to the right is from Day 3. You can kinda see the shine a little better from this angle, but the picture doesn't do it justice! The nails still look perfect...no chipping, no wear & tear at the tip.
Because I went too close to the cuticle, some of the polish lifted a little toward that end. You can't tell in the pictures, but you can feel it...especially when running your fingers through you hair! LOL So that was my bad...other people have reported that they stay in perfect condition for 10-14 days, even longer.
This next picture to the left is from Day 5. They look like I just got them done! You can kinda see that my nails are growing out a little, but besides that, they look great.
At this point, I was kinda getting annoyed with the length of the nails...This was the longest I've kept them in awhile, and they just started to bug me. I didn't do anything about it at this point, because I wanted to keep taking pics...hehehe.
Sorry this picture is blurry! Sometimes you look at the little tiny screen on your camera and it looks perfect...but when you look at it on your big monitor...it's blurry as hell. Oh wellz...
This is from the last day I kept my manicure: Day 7. At this point, I really wanted to cut my nails to a more manageable length. From inspecting my nails, I could tell that the manicure would last at least a few days more, but I was also bored with the color. I mean it's pretty....but to wear for an extended period? I would need something more my style, like... a French manicure! LOL So that's why I removed them (soaking in acetone for 10 minutes then removing with an orange stick is the proper method), and began a new manicure!
Here is a pic of my mom's manicure. This is two coats of June Bride. I think my application was a little flawed because in the pic, the color looks darker on the tips. But this was back when I was still figuring it out, so don't judge! LOL She has also removed her polish, but she didn't want to get a new manicure yet...she broke two nails yesterday while cooking, and she doesn't know what she wants to do yet, lol. She said her nails grow fast and I think she wants to wait for them to be a little longer before doing another Gelish manicure. Two weeks is a pretty long commitment....
So this is my current manicure...my right hand. I used Water Field as my base, and Good Gossip as my French Tip color. Then I added some big bling in Teal & AB. I was basically doing this to test if rhinestones stay better with the gel system. Unfortunately, these rhinestones were too big...the top seal is too thin to have a rigid hold on the rhinestones. I think I should use regular clear gel to secure them...
Here is my left hand...with light pink & AB rhinestones. I think the teal stands out a lot better, but the pink does have a nice soft look. These two pics were taken right after I finished my manicure.
Unfortunately, I lost a few rhinestones already...replaced them, and have lost one again. This is definitely a pain in the butt....the lost rhinestones leave a ridge, so my nails aren't smooth. =( Bleh!
And also unfortunately, the camera is not picking up the gorgeous gel shine and all the sparkles! LOL But, as you can see from the pics, I don't look like I'm wearing anything but regular nail polish! My coats are very thin and even, and I stayed the proper distance from my cuticles. My top seal is a little thick on the nails that have the rhinestones, but I'll have to figure out a better way to apply those next time. I think my mom wants some bling in her next mani, lol.
I did post a quick video on YouTube showing all the pics above. It was just a slideshow, but here's the link anyway!
It's hard for me to compare Gelish to other brands...I've heard that Shellac actually applies thinner (perhaps easier?), but have you seen the bottles? They're smaller than the Gelish ones! Both are about the same price, but the Gelish Polish comes with .5 floz while the Shellac only comes with .25 floz. Crazy! You get double the product for the same price! I don't know if you'll necessarily use 1/2 as much Shellac just because the product applies thinner, but I don't feel like my coats of Gelish are THAT thick anyway. The Axxium system doesn't come in a nail polish-like bottle (which Gelish & Shellac do). The Axxium gels come in a pot, which you need a separate brush to apply. Each pot runs around the same price as Gelish and Shellac, but it only comes with .14 oz (not sure how that converts to floz). I believe the Axxium system applies the thickest of the three.
I'm really happy with the Gelish system...which seems to have more color choices than the other two. I don't think I'll be trying Shellac, but the OPI colors do interest me (I absolutely adore "I'm not Really a Waitress"!). I'm quite tempted to try it out...but I don't think that'll happen in the *near* future. Will keep you updated if I do test it out! Maybe I'll ask my manicurist friend if I can mooch of her, tee-hee!
Anyhoo, will have to wait and see when my next post is! It'll prolly be a little sporadic until a few months after the baby is born, but I'll try to post stuff when I can! =)
Update: ShearUp.com is offering my readers 10% off if you use the promo code: PRINCESSTEA
(Please note that I don't get anything if you use this promo code. This is completely for your benefit!)
Disclaimer:
1. I bought every product I'm showing by myself (nothing was sent to me for free). -- Exception, my mom bought me the Gelish Polish System. =)
2. No one has paid me or compensated me for this video or blog.
3. I am not affiliated with any of the companies of the products I used.
4. These are my honest opinions.
Hey Everyone! I know this post might be a shock to some of you, considering how often I've been blogging recently. I can't promise regular updates, but I'll try my best.
I definitely might have to cut down changing my polish...my poor hubby thinks all the fumes I'm breathing is bad for me (and it probably is), so I'll be a good little wife and actually listen to him for once. =)
Anyhoo, so here's the look I have on my nails right now. I based this on a picture I saw on the internet, but unfortunately I have no idea who's picture it belongs to. =(
The video:
I really just chose the colors based on what nail polish I just bought. I thought it'd make a cheerful summer look. =) I didn't add any of those gold balls on my right hand...but I really liked the way it looked on my left hand. They just add that extra little bit of bling, lol.
I'm not too happy about the petals on my thumbnail because they are pointed funny...but that was my first attempt. Next time, I'll be able to draw my petals much better!
Well, I hope you liked this look! I'll probably have another post up within the next few days...I have an update on the Del Sol nail polish (Superhero). And after that, we'll have to see...I accidentally got my camera's memory stick stuck in a place I can't get to. =( I'll have to have a professional take a look at it...hopefully soon.
Till next time!
Disclaimer: 1. I bought every product I'm showing by myself (nothing was sent to me for free). 2. No one has paid me or compensated me for this video or blog. 3. I am not affiliated with any of the companies of the products I used. 4. These are my honest opinions.
Wow, I feel like I've been gone forever! I kept procrastinating my Smart Nail's video because I didn't have a good place to video it. I finally did upload it today, and I just wanted to do a quick review on my blog.
This picture to the left is my final look. I hate how YouTube really messes with the quality of my pictures and video. I shoot everything in HD, but they certainly don't look HD when published on YT!!!
Anyhoo, that's why I also have a blog, right? Actually no...I have a blog to just talk and vent, and all that good stuff that I don't bother doing on YT, lol. So yeah....back to the review.
Here's my video of actually using the product:
You can see what came in the mail in the video (sorry, I don't have pics!). In the video, I'm using the Smart Nails Template N001 (French Manicure). It was super easy to use on BOTH hands. You basically put on a base color, stuck the template to your skin (I used it on the back of my hand) a couple times, and then placed the template on the nail. After a couple coats of nail polish, you remove the template carefully (so you can reuse it), and store away. The instructions are on the back of the template packaging.
In addition to what I have on the video, I also tested it using my left hand (working on my right). I reused the SAME templates I had used on my left hand. Unfortunately, I skipped the step of sticking it to the back of my hand first...so it did mess up my base color a little. However, a coat of Seche Vite (Top Coat) fixed that right up. I had figured I wouldn't need to do it again since I had already used these templates, but apparently that is not the case! LOL I have never gotten such perfectly straight lines using my left hand before (including other template/tape methods), so I was really happy with it.
Pros:
-Easy to use with even your non-dominant hand!
-Reuseable (if you're careful!)
-Good Quality Templates
-Reasonably Priced (Approx $3 for each package of 10 templates + shipping)
-Fast Shipping (About a week from Romania)
-Friendly Customer Service!
Cons:
-A little hard to remove the template from backing -- must be extremely careful if wearing nail polish already!
-Not sure how many times you can re-use (will get back to you on this later!)
-Easy to warp template if not careful
All in all, I would definitely recommend this product to anyone! It is simple to use, and does exactly what it is intended for! I haven't tried out my other template yet, but I know it will turn out adorable (I got the cat template...thought it might be cute for Halloween, lol).
Next, we have the Del Sol nail polish that I used in the video. Here's the two shots of it (one in the shade and one in the sun.)
So basically my mom got this nail polish for me from her Alaskan Cruise (isn't she lucky! LOL). She got me four bottles, but I've only tried out 3 so far. I don't have a shot of the 3rd one yet (although it's by far my most fave out of the set!). This nail polish came from a store where they sold everything that changes color in the sun.
In this picture, I'm wearing Daydreamer as my base color and Super Hero as my tip color. Daydream has this opalescent sheen in the shadows, but in the sun, it's supposed to be a vivid purple. Unfortunately, I only used one coat in this picture, and you couldn't see the purple too much in the sun. =( I think you can kinda see the darker purple glitter start to stand out a little...
Super Hero starts off as a light, metallic blue in the shade. In the sun, it's supposed to be a soft lavender color. You can kinda see the difference...right?
I can say, in real life, the pictures pretty much are spot on. The changes are minimal. I have my mom wearing 3 coats of Daydreamer, so I will have to see what it looks like in the sun (I just did them last night!). She told me today it really turned purple, so I'm excited to check it out tomorrow.
I've worn this look for about a week, with minimal chipping. I think if I had refreshed the top coat (like I normally do...), the polish would have lasted a little longer. I'll be taking off this look to do a couple swatches, and then trying out a summer Kiwi fruit design (courtesy of Linda165 on YT).
Hope this was informative and helpful! Till next time~
Disclaimer:
1. I bought every product I'm showing by myself (nothing was sent to me for free). -- Exception, the Del Sol Nail Polishes were a gift from my Mom. =)
2. No one has paid me or compensated me for this video or blog.
3. I am not affiliated with any of the companies of the products I used.
4. These are my honest opinions.
Finally...finally...FINALLY!!! I've finally posted a video. Finally. I haven't posted one since....January. Isn't that terrible? I got so caught up in the wedding, then the whole morning sickness fiasco, and then just plain being lazy. But now, I've got my butt in gear, and I have officially uploaded a video with not one, but TWO designs! Go me!
Here's the Video:
I have a quick explanation of where I've been, and then two nail designs. I included a picture of my mushroom nails (from the previous blog), but that was just for fun.
Here's the two looks I created:
Aka JcBelle's Wedding Look #1. Both of these looks are created from my friend's wedding colors. Our bridesmaid dresses are a deep wine color. I'm still playing around w/ the look....
I used: Zoya's Irene; Orly's Vixen; Nail Star's Red Glitter, Green Glitter, and Gold; and Seche Vite's Recondition & Top Coat.
Aka JcBelle's Wedding Look #2. This time I skipped the "wine" color because I wasn't liking it with the green. One of her other colors is Chartreuse, which I adore. The closest I came to it was Precision's Limon. =)
Here, I used: China Glaze's Watermelon Rind, Nail Star's Gold, Precisions's Limon, and Seche Vite's Recondition & Top Coat.
The Watermelon Rind and Limon, I specifically bought for the wedding. Everything else I've bought a while back. It felt nice buying new polishes again, even if I don't really have a spot for them, lol. Maybe I should invest in another rack? And maybe I should actually hang it on the wall this time. I have a nice spot behind the door, tee-hee.
At Sally's Beauty Supply, they have a coupon where if you buy two China Glaze polishes, you get a Seche Vite Perfect Nail item for free (a $9.99 value, lol...don't I sound like a comercial?). I decided to try it out. So far, I can say I'm really enjoying the Recondition. I haven't noticed a difference in my nail yet, but it's only been a day. What I do notice is that the Seche Vite top coat seems to work really well with this as a base coat. I noticed it completely dried a lot quicker and I can't wait to see if there are any changes in the strength of my nails. My nails are pretty close to 100% of what they used to be. Which I am completely thankful for since my friend's wedding is NEXT week. =)
I also went to Ulta for the first time. There's one in Pasadena (which I had NEVER knew about, shame on me!), and I was really happy I decided to stop in. I would describe it as a Sephora that carries not only high end brands, but also drug-store brands. They had an impressive nail polish variety, although I didn't really buy anything except for Sally Hansen's Color Quick Fast Dry Nail Color Pens. They were Buy 2 Get 1 Free (a $7.50 value?), so I decided to give it a try. I bought Coral Pink & Black Cherry, then decided to go with a Nail Art Pen in white as my freebie.
I thought having your nail polish in a pen would give you better control in application...enough to do designs with. Unfortunately, this was not the case. The brush is actually still pretty big, so instead of doing French tips as my original plan, I ended up doing the whole nail. On the plus side, doing the whole nail was actually pretty quick. Here's a picture of the Coral Pink on my mom. I added some purple flowers to dress it up a little. She didn't like it...said I didn't make them look nice. Wtf? Just ignore the last 45 min I spent on your nails! LOL
After I was done with her nails, she had me do my aunt's nails. This time she insisted that I make them look nice. Whatever that means! I asked her what design I should do, and she said to just make them look like mine (this was when I was sporting the mushroom nails look, lol). I decided to forgo the mushrooms, and stick to a double French Manicure. I think they turned out alright....if a little plain and boring.
Hmm, how would I have spruced this up for myself? More glitter! LOL! Kk, maybe not glitter...but rhinestones or something...or flowers. I have no clue why flowers are my go-to....
I've marked a BeenaPop video as a favorite so I can come back to it sometime this week. I think I'm going to try a variation of it with the wedding colors...so theoretically I'll have another shot of it. (Not going to make it into a video when there's already one out there...?)
Anyhoo, much love till next time!
Disclaimer-
1. I bought all the products show or talked about in this blog.
2. No one is paying me or compensating me for this blog.
3. I am not affiliated with any of the companies of the products I used.
4. These are my honest opinions.