Showing posts with label MAC. Show all posts
0

MAC Zoom Lash Mascara Pics

Saturday, June 23, 2012
Hi Everyone! I just picked up a couple tubes of the new MAC 'Beth Ditto' Zoom Lash Mascara: Blue & Burgundy.  I absolutely love them and I plan to go back and get the Plum & Black next time I get paid, hahahah. =)

In this pic, I'm wearing the blue mascara (and in case you're wondering what else is on my eyes, tokidoki pink from the adios palette, Sephora blue metallic liner up top, and Sephora silver liner on the bottom).  I have two coats of the mascara, and I absolutely love how it makes my eyelashes look so much longer and curls without needing a curler.  I mean..you can see my lower lashes (which are normally invisible) pretty clearly in the pic (as clear as it gets, lol).  And you can actually see the blue-ness.  I always dig having colored eyelashes...

Now I'm not sure how much you can actually see the Burgundy color in the pic to the right.  Ugh, I can see my puffy eyes, hahaha.  I noticed my right one was super puffy today, but some gentle patting has helped a little.  In this pic, I'm wearing light pink, pink, and light purple on my eyelids (from the 88 shimmer palette), MAC's navy eyeliner (the mechanical kind) on the upper lid, and Victoria's Secret's purple glitter eyeliner on the lower lid.  I then added two coats of the Burgundy Zoom Lash. 

Like I said, I really like these mascaras and I've gotten loads of compliments on the blue one.  I think the Burgundy is a little more subtle and harder to notice, so no one's said anything yet.  But the day is still young...LOL.

Random notes (yes, this isn't a full review...there's loads of them out there.  This is more my personal opinion of the mascara.): It applies pretty well, and doesn't clump.  I feel like one coat isn't enough...but two makes my lashes look longer and fuller.  I don't usually wear mascara everyday (eyeliner is my absolute "won't walk out the door without" makeup), but since I've gotten these, I've really enjoyed applying it almost everyday.  Would I recommend it?  Absolutely.  I got mine at the MAC store, and they run about $15 each, which IMO is well worth the price.  I don't know the rules of how long to keep mascara, but I usually go through a tube (if I were it often) every 3-4 months.  Maybe I should stock up, in case they take these away? 

Till next time!
0

Some Random Manicures I've Been Sporting...

Sunday, October 24, 2010
Hey Everyone!  I had an awesome time on Friday, and I'm sure you can guess where I was from the pic: BLIZZCON 2010!!!  And yes, that's a glittery Horde symbol on my cheek.  It took me 1/2 an hour to draw on, but I loved the way it turned out.  Sorry the pic is blurry...I didn't even take backups. =/ Ah wellz!


It was sooo much fun to test out Diablo 3 (this time they had 5 classes to check out...last year they only had 3).  They announced the last class: Demon Hunter...which sounds like it's going to be fun to play!  I also tested out Cataclysm beta, and played Worgen for the first time (last year I only tried the Goblins).  It looks like it's going to be fun as well.


But enough geek talk, moving on to makeup and nails!


So I decided to try out Finger Paints's "Be a Pal-ette".  I didn't take a pic of my look before I threw on a design, but you can kinda get a good idea of the color from the pics.


The color was pretty solid after two coats, and it's a pretty, shimmery, purple for the fall.  I wanted to do a Konad design, but I didn't have my plates with me at my new home (still at my parents's house, lol), so I just made do with what I had: mainly the white and silver striper polishes.


I know this kinda ends up to be my fallback design when I cover my whole nail in a polish.  I really should expand to more designs, but I don't really have a long attention span at the moment.  I like designs that are quick and easy. =)


In the top pic, I used Seche-V, the UV top coat.  Unfortunately, it does not work the same as their regular Seche Vite top coat.  I thought I had waited long enough for the design to dry, but when I applied the top coat, it smudged!  This normally doesn't happen with Seche Vite.  I was pretty disappointed.  Plus...after I set it with the UV lamp, it still wasn't really shinier or glossier than the regular Seche Vite top coat.  I might have to try this over a different polish to compare.
In the other pic (the one on the left), I used Seche Vite, and like I said, I couldn't really tell a difference between the two.  In fact, the one with Seche-V chipped first.  Sad, isn't it?  It also chipped within a few days...didn't even last a week.  I couldn't stand having chipped nails, so I decided to change my look.  I will say, though, the Seche-V removes pretty easily with nail polish remover.  I hate it when it takes forever to remove nail polish! LOL


Next, I decided to try MissChevious's Vampire Nail design.  Here's a link to her video: http://www.youtube.com/watch?v=pkgbp1mOe5Y .  This pic to the right shows two coats of China Glaze's "Lubu Heels".  It looks almost completely black, but you can still tell that there's a hint of red glitter.  Two coats gave a pretty opaque coverage.


I know in the video, MissChevious covers her whole nail in the vampy polish, but I was in the mood for a French, lol.
I added my fangs to the ring finger, and then added some drops of blood.


I think the mani turned out to be really cute!  I definitely like doing Halloween looks, although I'm not too fond of creating them myself (in case you haven't noticed, I haven't done a Halloween tut this year!).


I topped this look off with Seche Vite, and was happy to report that this look lasted a week before it chipped.


Lastly, I was tired of worrying about chipped polishes, so I decided to sport another Gelish manicure. =)  I'm still wearing this look.


Basically, this is Gelish's "High Bridge" as the base color and "Gossip Girl" as the tip.  I then put on a little nail art flower on each nail (from Sally's Beauty Supply), and topped it with a generous amount of Gelish's Top Seal to ensure I wouldn't lose it, lol.  So far, it's been about 4 days and it's lasting just fine.


I don't plan to change my nails anytime soon, but I'll keep you updated on how this manicure lasts.  Unfortunately, I broke my pointer finger on my left hand...instead of doing the "right" thing and taking off the Gelish manicure to fix, I've been trying to keep it together with just some nail glue.  But of course, this doesn't work...it stays solid for only a day....the break has gotten bigger now.  I may have to just suck it up and redo that nail properly. =/


Anyhoo, I realized that in my haul, I didn't mention that I did buy one other thing from the MAC Venomous Villains collection: a mineral eye shadow for Maleficent "My Dark Magic".


It's a black and pink shadow on one side, and a black and opalescent shadow on the other side.
I had a hard time deciding whether to get this duo or the other (She Who Dares).  I only decided on this one because I figured I'd use these colors more.  It's not very often I'd wear a dark green or dark blue shadow.


When I bought this, I was told the colors would show up better with a greasestick base (which I coincidentally already owned, lol).
As you can see, without the greasestick, the colors are very faint.  I'm sure you could layer it until you got the right color, but why bother when you can easily get the dark rich colors with a greasestick?


I absolutely love how it looks with the greasestick....it's like a black base with pink/opal shimmer.


So far, everytime I've worn this shadow, I've used my greasestick.  This also makes the colors stay on longer...at least 8 hours. =)


I think I'll experiment on this with my eye shadow mixing medium (aka Glycerin and water, lol).  I want to know if this make any impact at all....I'll let you guys know how it turns out. =)


Anyhoo...that's all I have for now.  Till next time!


PS Sorry if the blog looks a little funny...I had to change templates, and I'm having some technical difficulties, lol.  Hopefully the next post will look better.


Disclaimer:
1. I bought every product I'm showing by myself (nothing was sent to me for free). 
2. No one has paid me or compensated me for this video or blog.
3. I am not affiliated with any of the companies of the products I used.
4. These are my honest opinions.
0

Fluidline in My Waterline!

Thursday, September 30, 2010
Hi Everyone!  As promised, here are some pics and my thoughts about putting MAC's Fluidline in my waterline.

To the left, I have a pic of how my eyes looked after I had put on eye makeup (without mascara), including the gel liner in my waterline.  As suggested by JuicyStar07, I dried my waterline first, with a cotton swab.  Then, using an angled brush, I applied MAC's Blacktrack into my waterline.  Drying my waterline with a cotton swab felt a little funny at first, but it wasn't as bad as I thought it was going to be.  I do agree that it helps the liner apply easier, and probably helps it stay on longer, so it's a good step to include.

This second pic is blurry, but this is after I applied a purple eyeshadow (the darker color of NARS's Jolie Poupee Eyeshadow Duo) over the Fluidline.  As you can see, it softened up the lower lashline, so it wasn't a harsh black line.  Plus, it's always good to set a liquid with a powder. =)

This pic to the left was taken 8 hours after application.  I know my eyes look like their facing weird directions (I feel like ALL these pics make me look like I have a lazy eye or something!)....but anyhoo, you can see that most of the waterline makeup is still there.

Yes, I know, this pic to the right is blurry, but you can see that if you're looking straight at me (and not down into my waterline), the liner is holding up pretty well. =)

Hmm...not sure why my eyes are kinda pink in all the pictures.  I don't remember them looking so pink that day....maybe it's just something the camera picked up.

Soo....in comparison, I must agree that gel-lining the waterline definitely lasts longer than just using a plain eyeliner.  Usually, I need to reapply a regular eye liner into my waterline every 4-6 hours (if I'm not being lazy, lol).  It's really annoying to have your makeup disappear (into your eyes?) after you've spent a lot of time making sure you have it they way you want.  With using a gel liner, I could apply it and forget about it, knowing that it'll stay put for at least 6-8 hours.  It applies really smoothly, though I want to get a softer brush.  My angled brush (MAC's 208) is perfect for eyebrows and applying gel liner to my top lid, but it feels a little rough when applying to my waterline.  I know MAC has a softer, albeit larger, angled brush...so I might pick one up this weekend...along with Bad Fairy (one of their 3 new nail polishes coming out for their Villainous Villains collection).  I've seen some pictures and reviews on it, and it looks fantastic!  And the guru's say that there's no dupe for it, so I'm definitely splurging the $12.50 for it. =)  I believe I'll be heading there on Sunday,  so I'll try to get it swatched that night to include with my latest nail polish haul.  I can't believe I haven't done one in FOREVER....but I haven't really bought that many since I've become preggerz.  However, I decided it was time to update my collection for the fall, and have bought quite a few polishes (8 so far, + Bad Fairy will make 9, lol).

I also have a quick and easy nail art tutorial that I'm putting together coming soon.  My nails look pretty enough for a bridesmaid in my best friend's wedding this weekend.  I'm not 100% thrilled with them, because they don't look close enough to the photo I based it on....but hey, that was probably done by a professional, and I'm just a lil old amateur.  =/  Still, I can't wait to show them off at tomorrow's rehearsal. =) I'll also be following a hair tutorial to get a Taylor Swift inspired look for my hair.  I'll probably take a before and after pic for that, and post them as well.  Lots of stuff to come, it seems like!

Anyhoo....till next time!

Disclaimer:
1. I bought every product I'm showing by myself (nothing was sent to me for free). 
2. No one has paid me or compensated me for this video or blog.
3. I am not affiliated with any of the companies of the products I used.
4. These are my honest opinions.
0

Re-Moisturizing My MAC Fluidline

Thursday, September 16, 2010
Hey everyone!  So my nails are currently nakkid (*gasp*) as I'm giving them a few days break before my next Gelish manicure.  My last one (the red French tipped one) lasted about 10 days.  Not bad!  I could've made them last longer, but I was getting tired of them, so I figured I'd give my nails a break, and then figure out my next mani. =)  I'm probably going to do another french manicure of some sort, but haven't decided on colors (I only have 4!) or type.  I'll post pics when I finish them up!

In the meantime, I decided to make a post (even though there's a million of them out there) on fixing a dried up gel liner.  My friend and I were in Sephora a few days ago.  She was looking for some serum, and I was looking for a gel liner to replace the ones that dried up (I had 4! =( ).  I had finally decided on a brand, when my friend came to see how I was doing.  When I explained why I was getting a gel liner, she was like..."why don't you just add water? Everyone does that! Just google it!" (or something like that, lol).  I had never thought of doing that, so I decided to go home without buying an replacements and look it up.
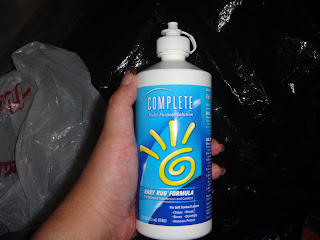
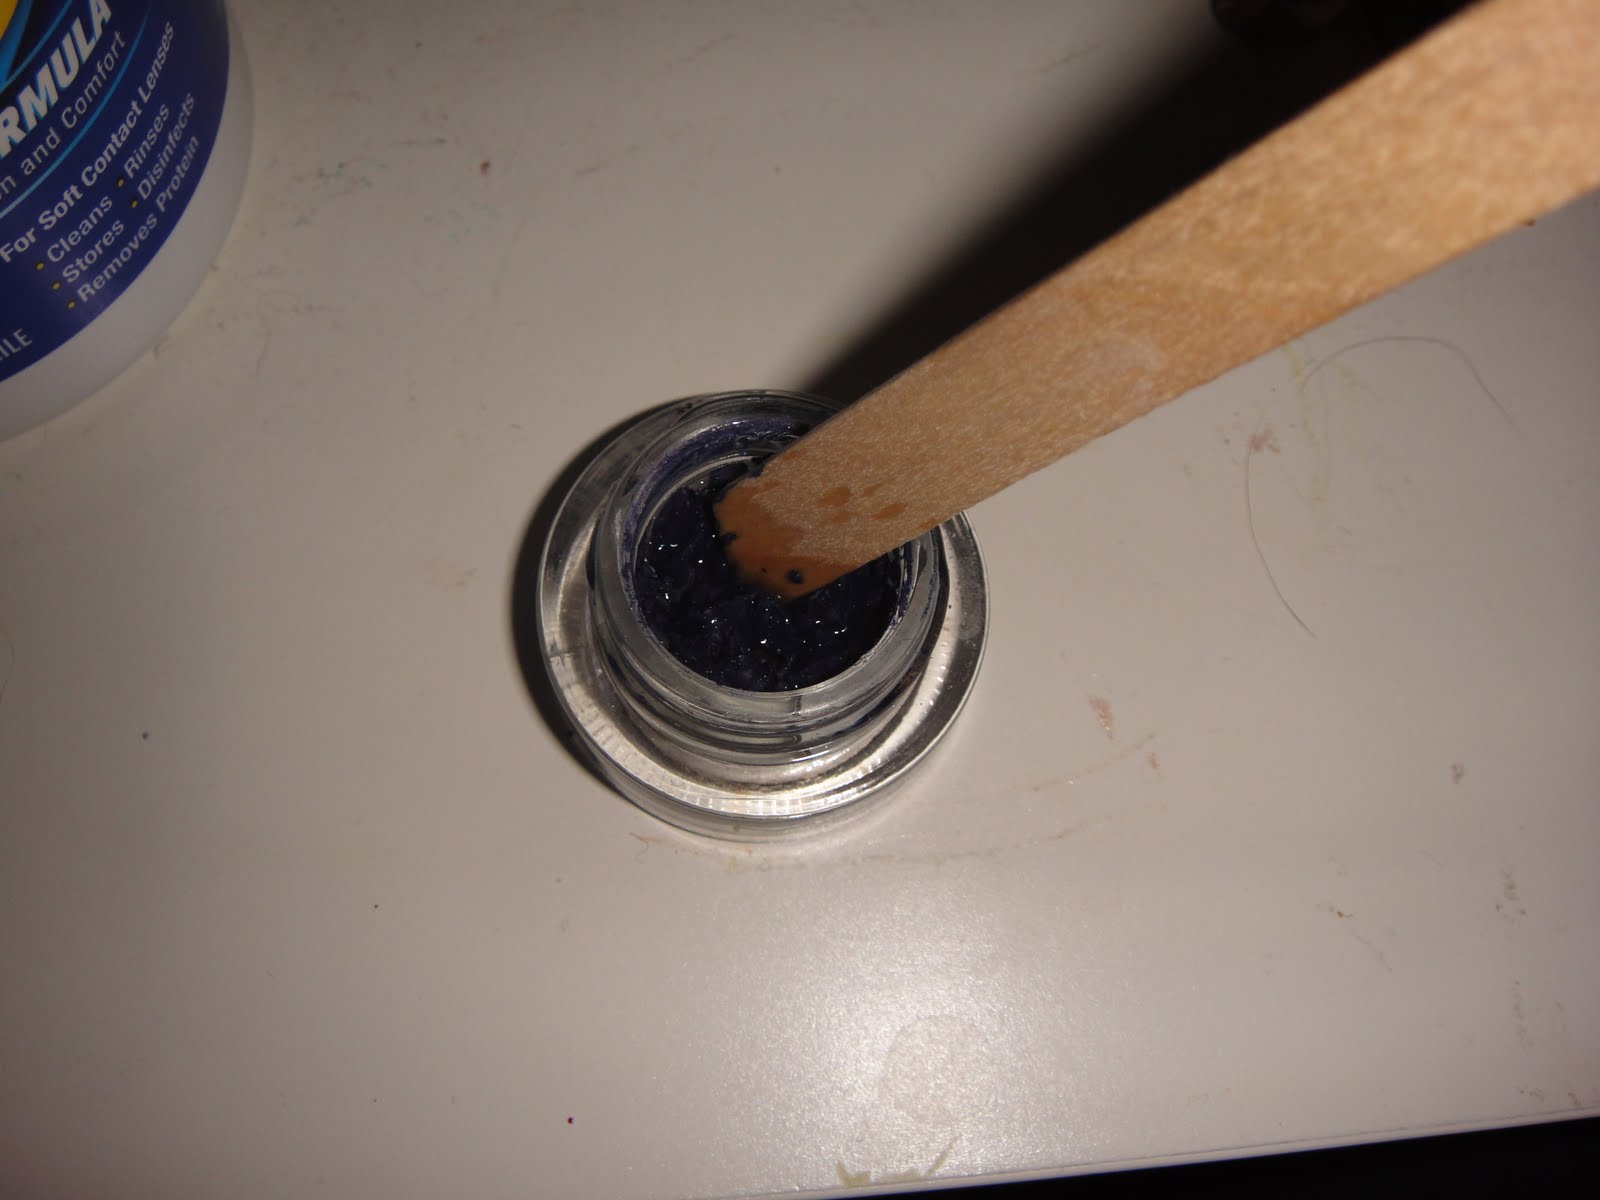
As you can see from the pic above, my gel liner was REALLY dried out.  I didn't take pics of the other 3, but they were in a similar condition.  After watching a few videos on YouTube, and reading a few blogs, I decided that I wanted to use contact solution.  I know some people think that contact solution doesn't work as well as eye drops, but whatever. =P  I decided on contact solution because it's obviously safe for your eyes AND it's supposed to be moisturizing (to some extent...yes, on this score, eye drops would be better....but I didn't have any on me at that exact moment!!).  Anyhoo, so here's the solution I used.  It's AMO's Complete Moisture Easy Rub Formula.  It's a relatively new bottle...I would really hesitate at using expired contact solution.  (Expired eye drops are okay though.)

Next, I took some hand sanitizer (for this, I would recommend a non-scented one because you don't want any irritants).  I cleaned a new waxing stick with this, to kill all bacteria.  Since you're working with stuff that goes near your eyes, you want to be extremely careful as to your tools and cleanliness.

I then put in a few drops of the contact solution into my gel liner, then started mixing it.

I actually mixed this for a good amount of time because I wanted the consistency to be even.  Don't worry if you used too much contact solution...I'm pretty sure I put in too much too!

After I felt like I had gotten a pretty good even consistency, I used the stick to clean up the sides and push everything down to the bottom of the container.

What I ended up with is to the left.  As you can see, the excess contact solution was at the top.

This was easily remedied by getting a q-tip and slowly patting out all the excess fluids.

It seemed to work out pretty nicely.  However, when I tested the gel liner, the line was pretty watery.  So I decided to heat it up and let it cool, in hopes that it would lock in the moisture.

I took some boiling water, and let it cool for about 5 minutes.  Then I put the water into these little cups and stuck each gel liner into one.

Then I let this sit until the water was cool (about 10 minutes or so).

And the final result looked like this.  Now when I tested it again, it still wasn't the exactly right...if you drew a line with a brush, it was still really easy to wipe off (not how a gel liner is supposed to be!).

So I decided to let this sit overnight (closed, not open!), and test it again in the morning.

To my surprise, in the morning, the gel liner was exactly how it was supposed to be!  I'm sorry I don't have pics on the testing I did, but I think you'll see what I'm talking about if you try this.

Anyhoo, soooo the whole reason I even wanted to get my gel liners back was because I watched a YouTube video where someone used a gel liner on her waterline.  Now, I normally use a regular pencil (or a kohl pencil sometimes) on my waterline, but I find that it doesn't stay very well.  The girl (JuicyStar07) said that she dries her waterline with a cotton swab first, then applies a gel liner.  She also suggests patting on a powder shadow to set the liner.  Verrrry interesting...I wouldn't have thought to do that myself (except the powder part, lol)!  So...I haven't actually tried this just yet...but I will!  And I'll have to post back on how it went.    I'm actually a little hesitant on the part where you dry your waterline with a cotton swab.  I'm scared of fluff getting in my eyes...it's just those little strands that are so hard to get out, you know?  Well, whatever.  I'll have to buck up and try it, lol.  Be a real (wo)man.

*Yawn* Time for bed!  Till next time!

Disclaimer:
1. I bought every product I'm showing by myself (nothing was sent to me for free). 
2. No one has paid me or compensated me for this video or blog.
3. I am not affiliated with any of the companies of the products I used.
4. These are my honest opinions.